
How to Freeze Garlic: Two Easy Methods to Save Time and Flavor
Want to save time in the kitchen? Learn how to freeze garlic two easy ways — using a silicone mold or just a Ziploc bag! This method keeps garlic fresh, flavorful, and ready to use. Watch the full video tutorial and get all the tips in this post.
FREEZE & STORE SMARTSMART COOKING SHORTCUTSFREEZER READY SERIES
BY EYA
How to Freeze Garlic the Right Way!
If you cook often, you know that garlic is a must-have in almost every dish. But peeling and chopping garlic every single time can be a hassle — especially when you’re in a rush.
Good news: you can freeze garlic, and it’s a total game changer! In this post, I’ll walk you through two easy methods to freeze garlic at home — whether you’re using a food processor, silicone mold, or just a simple Ziploc bag.
Welcome To Smart Kitchen BY EYA
Hi, I’m EYA — here to help you cook smarter, save time, reduce food waste, and make the most of every corner of your kitchen.
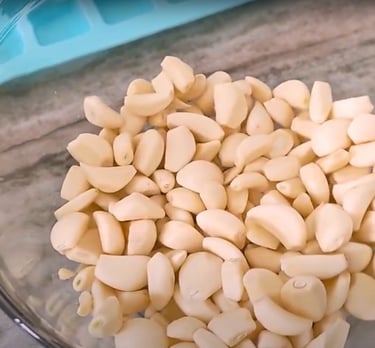
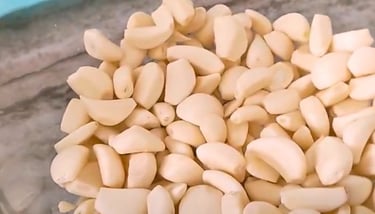
Step 1: Choose Your Garlic
Start by deciding which kind of garlic you’ll use:
Pre-peeled garlic: Convenient and saves time
Whole garlic heads: Great if you grow your own or prefer organic
Whichever you choose, make sure to check where it’s from and do a little research — quality garlic makes a big difference.
How to freeze Garlic - Video 🎥
Storage Tips
Use airtight containers or heavy-duty freezer bags
Store for up to 6 months
No need to thaw — just toss it straight into your pan or sauce!
Want to See It Step by Step?
I walk through both freezing methods in this video:
🎥 Watch the tutorial on YouTube
You’ll also find helpful tools I use, like the silicone mold and vacuum-seal container — all linked in the video description!
More Freezing Tips You’ll Love:
Thanks for stopping by! Don’t forget to subscribe to my YouTube channel and follow along on Instagram for more smart freezer hacks.
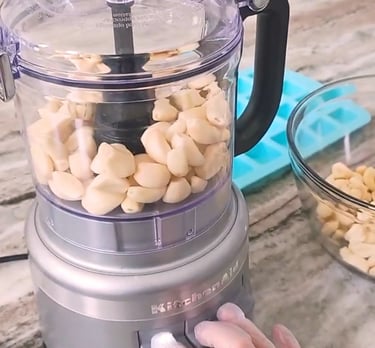
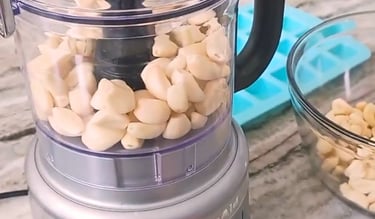
Step 2: Prep the Garlic
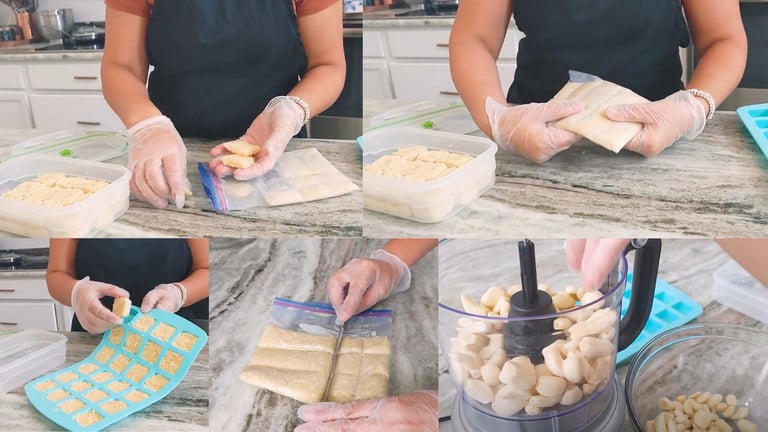
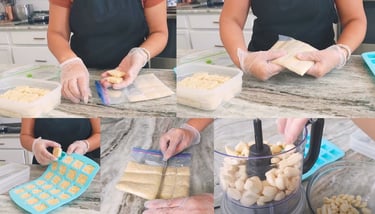
If you're using a large quantity, the easiest way to prep is with a food processor:
Add the peeled garlic to the processor
Don't add any ingredients if you’re freezing it
If storing in the fridge instead, you can blend it with salt and olive oil, pack into a jar, and cover with a thin layer of oil to preserve (must be used within 1 week)
👩🍳 Freezer tip: For long-term storage, skip the oil and salt — freeze it plain.

Freezer tips


And if you're a visual learner, you can watch the full video tutorial here:
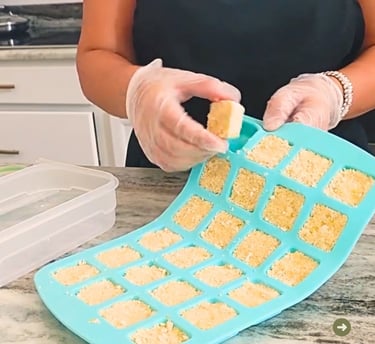
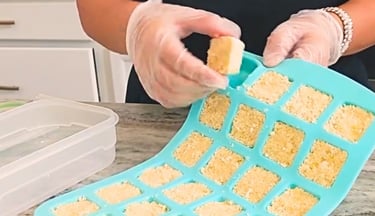


Method 1: Freezing Garlic in Silicone Molds
This is my favorite method because it gives you pre-measured garlic portions ready to pop into any dish.
How to do it:
Scoop 1 tablespoon of ground garlic into each square of a silicone mold
Cover with plastic wrap (if your mold doesn’t have a lid)
Freeze for a few hours
Transfer the frozen cubes to an airtight container or freezer bag
Optional: Use a vacuum pump to remove extra air
Each cube = approx. 1 tablespoon of garlic. Easy, mess-free, and super convenient.
Don’t Have a Silicone Mold?
No worries! Here’s an alternative that works just as well.
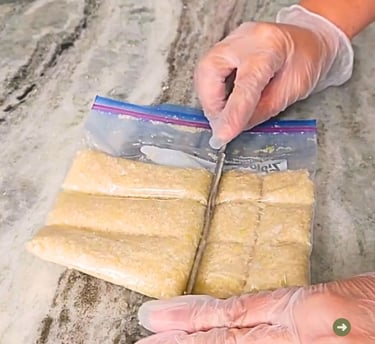
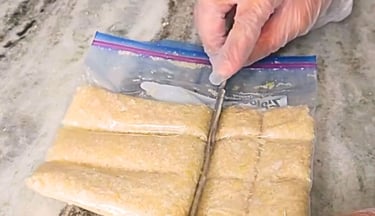
Method 2: Freezing Garlic in a Ziploc Bag
Spread the garlic in a flat layer inside the bag
Use the back of a knife to gently score it into squares
Freeze for a couple of hours
Break into chunks and store in the same bag or in a separate container
Remove air as much as possible to prevent freezer burn
You might not get perfect measurements, but honestly… there’s never too much garlic, right? 😉
Join the Smart Kitchen Community
If you love tips on freezing, storing, and enjoying food the smart way, you're in the right place! Don’t forget to Grab my Free Guide: 10 Foods You’re Freezing Wrong (And How to Fix It)
📝 Looking for more kitchen-smart recipes? Explore the Recipes section of the blog.